
We may earn money or products from the companies mentioned in this post.
Lately, it seems like the days are getting shorter. I’m not referring to the amount of time that the sun is shining now that summer is turning to autumn. It feels like someone decided that there needed to be time budget cuts, so they made each day 20 hours instead of 24. Trying to balance work, school, HH, and home has left little time for blogging and nearly no time for me things like working out or manicures. The good news is that I’ve made some life changes to help balance things out a bit, and I’m back to Pintesting again. I missed you! So today I’m Pintesting the Gradient French Mani because I needed to spoil myself – thank you for the indulgence.
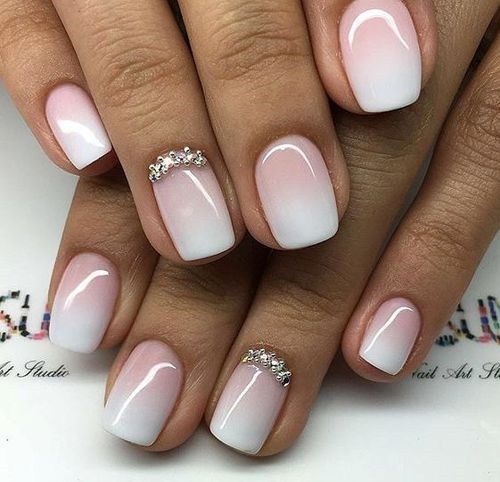
I saw this pin and was struck by its simplicity, elegance, and practicality. It’s hard to go wrong with a French manicure as a classic nail look, but I often have two problems with them. First, is getting the lines perfect. Second is that the tips always seem to chip; probably because the tips have more polish than the rest of the finger. Using a gradient approach solves both problems!
One of the things that I LOVE about gradient manicures is that you don’t have to worry about perfection. You choose your colors, blend while you apply, and smooth it all out with a top coat. If you haven’t tried this manicure method before, please check out this Pintesting Ombré Nail Art post for more detailed instructions. Since that post, I’ve learned that there is a difference between ombré and gradient.
- Gradient uses two or more different colors so that they blend together where they meet. (It’s what I’m doing this Pintesting on).
- Ombré is a gradual changing of shades of a single color from light to dark (or dark to light). For manicures, this is often done as a gradual progression of the individual shades of the color from one finger to the other with each finger having one shade of color.
- Ombré Gradient blends the shades of the same color on each nail or in a blended progression from one fingernail to the next.
The Pintesting:
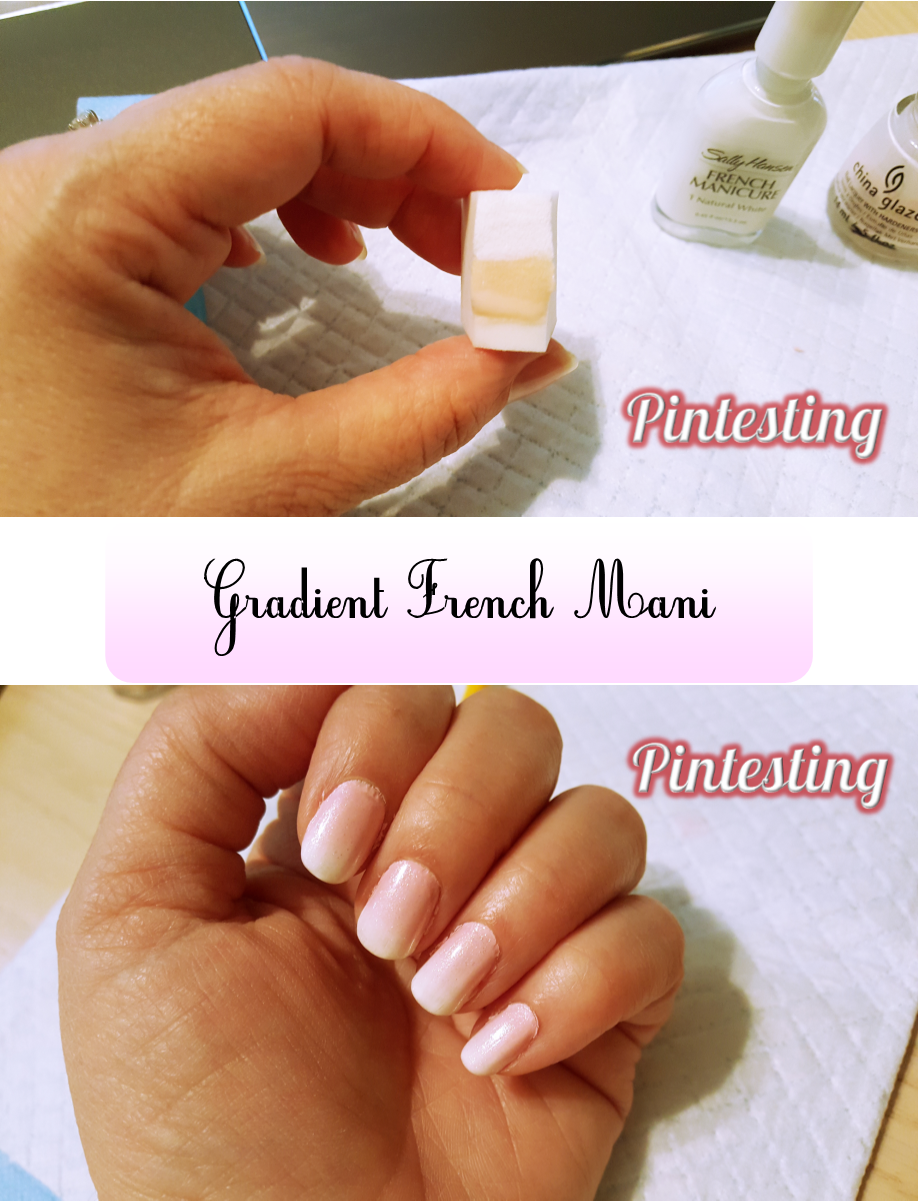
The elegance of the French mani keeps this very simple; white tips on a natural base. Because I’m doing a gradient I will need the two colors and a makeup sponge cut in half. I also used a base coat and top coat (as you always should).
I had to try a few different combinations of nail polish colors to get the look of the original pin. Because the French manicure is supposed to be white tips on a natural or close-to-natural base, the exact colors will vary by each person’s skin tones and personal preferences. The color below isn’t the one that I went with in the end, but it was the best photo for to show the general idea.
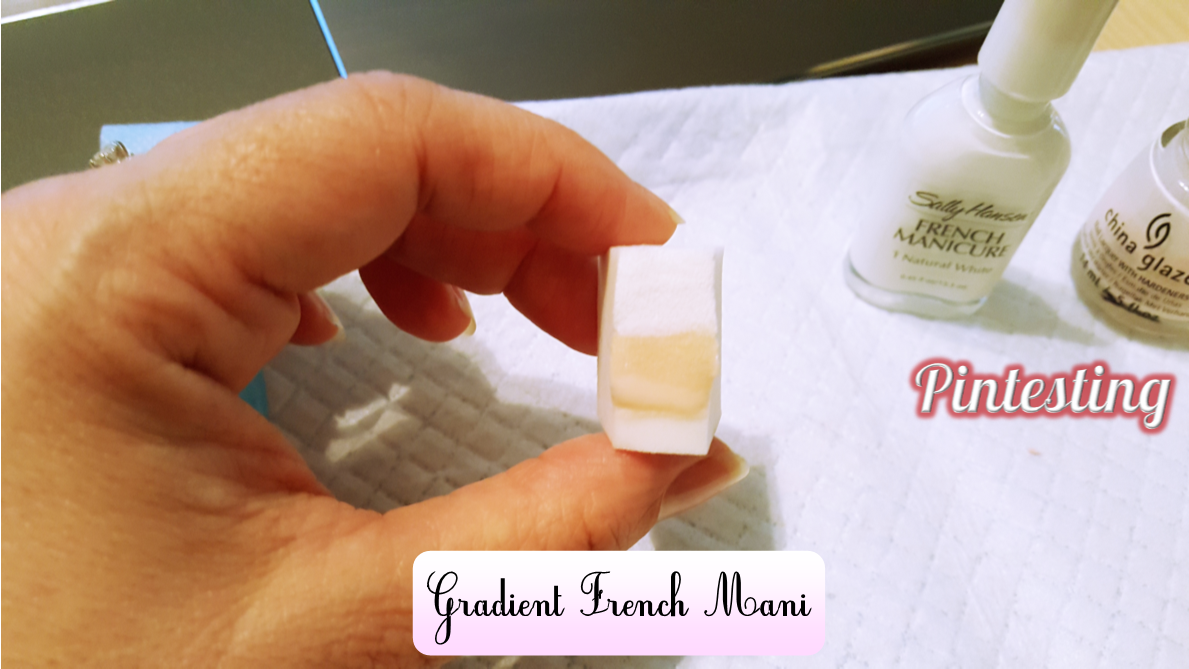
Paint the two nail colors on your makeup sponge. You don’t have to mix the colors in the middle; that will happen in the application. If you’re looking for a deeper pop of color, you can put a base of either the white or natural before you apply the gradient. I didn’t because I wanted this to be more subtle.
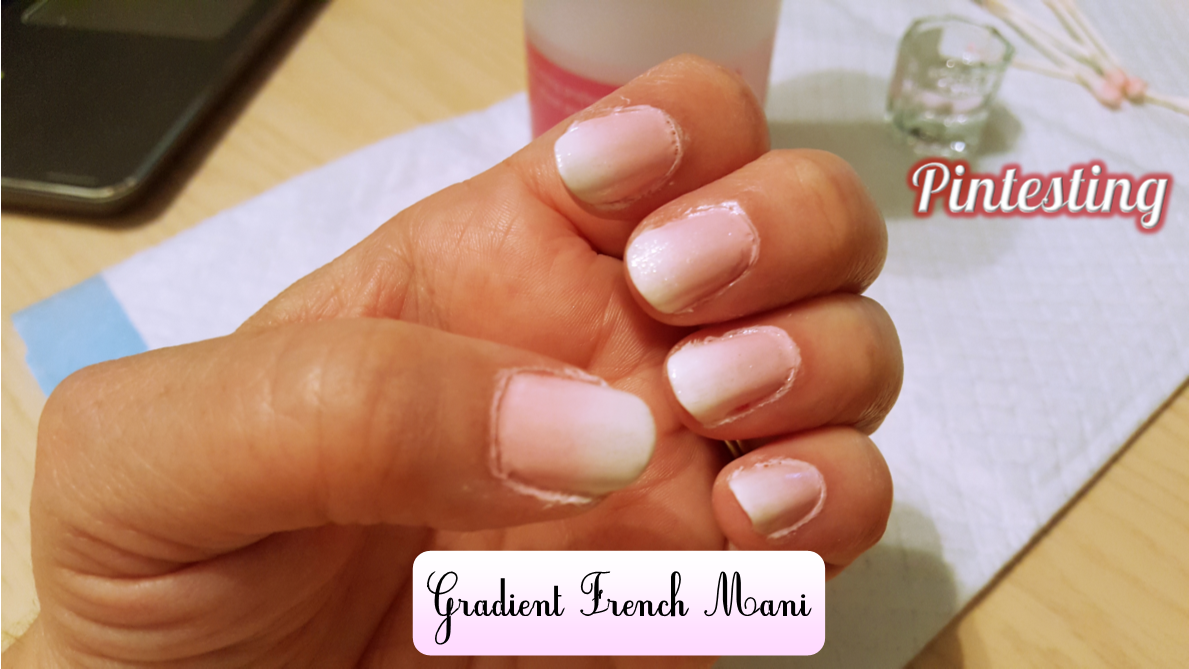
Dab and blot the sponge over your nail to apply the color. The dabbing motion will blend the colors in the middle and give the gradient effect. I did a second coat with the same process to get complete coverage. The polish did end up on my skin from on each finger and half way up to each first knuckle. This is after I cleaned most of the extra with the acetone and cotton swabs in the background of the picture.
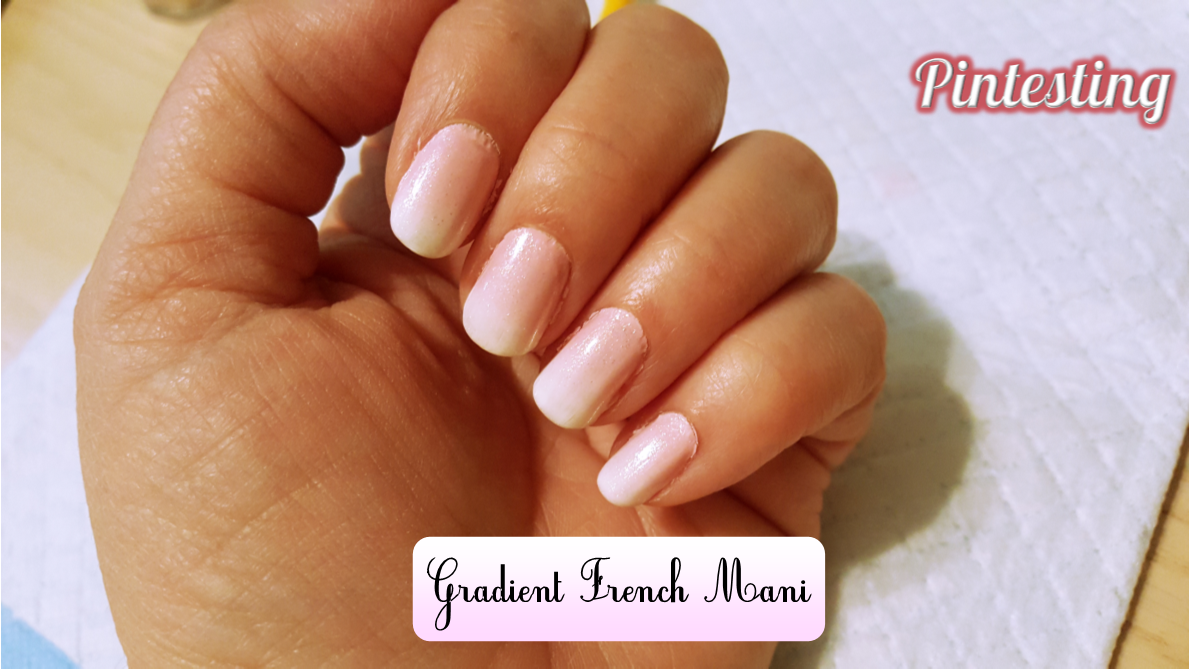
Finish with the top coat to protect your beautiful nails. I love the twist on this classic look. It’s classy enough to wear for business or an occasion, but the gradient gives it a playful twist.
APPLICATION TIPS:
- If you want to keep from having a ton of polish to clean off of your skin and cuticles, there are a few things you can do to prep them.
- First, use a really deep moisturizer or moisture barrier on the skin around your nails; petroleum jelly or Aquaphor work very well.
- After applying your lotion, clean your fingernails with a cotton swab and white vinegar so the polish will better adhere.
- Some professionals use latex body paint around each nail so that once the polish is on, you just peel off the latex “skin” and you’re good to go. If you’re in a hurry or on a budget, you can apply a thin layer of rubber cement or white school glue with a dollar store paint brush and you’ll have the same result. Just make sure the glue is DRY – completely dry.
- The polish will have a bumpy from the makeup sponge. DON’T WORRY! This will smooth right out when you put on the top coat.
- If you still have a bit of polish on your fingers, clean them up with a cotton swab or small natural-bristle paint brush and polish remover.
The Pintesting Results:
Overall Results: 4.3 Pins
Accuracy: Like many of the Pinterest nail pins, this linked back to a picture; one of 50 in the collection. There were no instructions or other links, nor could I find a contact or about page (thus the absence of the artist’s name). I was going to give this a rating of 3 Pins, but because I did have some experience with gradient nails, because it’s not difficult to find how-to instructions and videos online, and because the French manicure is a simple process anyway, I chose to give this 4 Pins.

Difficulty: I thought that this was an easier way to achieve a French mani look than lining up tape or stickers, or trying to keep a steady hand. 5 Pins

Time: When I do a French manicure at home, I use the curved stickers to achieve the look of salon precision. That takes some time and effort to make sure they’re aligned at the right angle and with the proper spacing for each nail. The gradient version isn’t as fast as painting your nails with a solid color, but it isn’t as long as traditional French nails. 4 Pins
Cost: A salon manicure usually runs about $15-$20. This is decidedly less expensive – if you already have some or all of the necessary items. If you have to purchase the polishes, top and base coats, and makeup sponges, then it would be roughly the same amount as a salon mani, but you would have the supplies to last for months. 4 Pins
Practicality: I love the classic look of a French manicure, and this Gradient French Mani is a simple way to make this an everyday look. 5 Pins
Pintesting
Pinterest addict, award-winning baker, and cookbook contributor - I'm Anne and I'm so glad that you've found Pintesting. This is where we test, review, and rate Pinterest pins on a weighted 5-point scale and sometimes share our own recipes, tips, and tricks.

